Pages

Showing posts with label Recipes. Show all posts

Saturday, July 5, 2014

Dr. Seuss Party

Hello everyone,

Last week my son turned one.  I know...it's crazy... time flies and I cannot believe he is already one! We did a Dr. Seuss theme party. I love The Cat in The Hat and the other characters, and I thought it would be a cute idea for his 1st birthday party.

Below are a few pictures of the party. The colors of the decoration were red, white and aqua.

This is a picture of my little angel :).

I decorated a coffee can to put the spoons. I made the truffula trees using broom rods and used tissue paper to create the trees.

The party favor.

I am very proud of the cake, it looks beautiful and tasted delicious. It was a 7 layer vanilla cake with alternated filling of vanilla buttercream and strawberry buttercream. The outside icing was swiss buttercream. Everything homemade and absolutely amazing!

I made sugar cookies, and chocolate vanilla buttercream icing cupcakes.


To entertain the kids my son helped them to make their own cat in the hat craft.

 A happy baby!!!!

A picture of all of us together, which you may also see how everything was put together. My oldest was The Cat in The Hat :).

It was surely a great party to celebrate our little one.

Hope you enjoyed the post. Happy holidays!!!

Thanks,
Fabiana

Wednesday, March 12, 2014

Dressing up

 Hello my friends,

Spring is just around the corner and I am very excited. The weather is becoming better in Chicago, which gives me a lot of motivation to exercise :).

As I expressed many times before, my son loves dressing up and playing super heroes. This weekend I made a Batman costume out of construction paper. We both had a lot of creating it, and he looked very handsome :).


Another thing that I did last week was to bake a cake. There is a baking website called Sweetapolita which is fantastic. I tried her recipes many times before and it always taste deliciously perfect. The recipe for the cake below is called perfectly delightful vanilla cake. I made the cake for a potluck and I received great positive feedback. They loved the taste and the decoration of the cake, which is something I am thriving to achieve. This recipe is easy to make and assemble; when you make it please let me know your thoughts.


 On Monday we had a homemade sushi night. I enjoyed making and eating, it tasted great.


As I said in my previous post I am working on decorating my sons room, which I finally finished. I wanted to do a nautical theme but on a budged. 


The most laborious decorating in the room was to paint the walls. The actual painting as it were was not so difficult but measuring the lines was time consuming However, the end result was fantastic.


I also gave a complete makeover to one of our chest of drawer to complete the nautical theme. It had a very boring brown color, and I painted it with nautical blue color. It looks like a brand new chest of drawer. When I remembered to take the picture, I had already painted one of the drawers hence the reason the old one has a missing drawer. With old drawers you may have to change the tracks as my husband did to make the drawer opening and closing smoother.


I bought a set of pictures from Etsy, framed and hung them above the chest of drawers.


I am very happy with the result of the room and my son really loves it, and my hubby was quite happy that it did not cost much :).

Have a great week ahead :). Thanks.

Fabiana


Sunday, February 23, 2014

Smoothies and more

Hello my friends :),

Winter in Chicago has been extremely cold. Although, I am from a part of Brazil that has cold winters; I have never in my life experienced -27 degrees Celsius, which was -57F. When my family in Brazil asked me to described how cold it was, I could not find words to explain the level coldness here. However, we are surviving (rsrsrs). We are trying to do as much as we can to entertain ourselves indoors, and sometimes we play Ninja as an option (rsrsrs).


Since I gained a lot of weight with my second baby, I have a lot to loose. The cold winter is not helping much with outdoor exercises, hence I am focusing on my diet, trying to eat as many vegetables as I can. I make a smoothie, which is super delicious and nutritious, and I also give it to my baby, who loves it. Every time I make it,  he eats all of it.

My little baby is 7 months old and he is already eating solid food. With my first baby I pureed all his vegetables and fruits, I never bought pureed food at the supermarket. With my first son this was also the case, I am determined to do the same with my second one. I believe that making your own food is cheaper, healthier and my children will most probably eat vegetables. My oldest is already proving to me that I was right as he loves salads and vegetables. Thank God my kids eat well and whatever I give them they eat.

The recipe is:
1 orange
1 banana
5 strawberries
5 blackberries
5 raspberries
1 handful of spinach
2 leaves of kale
2 leaves of collard green

After blending it I add a tablespoon of Chia seeds, which helps to balance your blood sugar, has omega 3, gives you energy for the day, and has anti-oxidants that helps to loose weight. It does not taste like anything. I also do not give the chia seeds to my baby. So, every day I drink about 1 cup of this delicious super healthy smoothie at lunch time as well as my baby. Sometimes I put rice pudding to make it thicker for my baby. 


 There is always a happy baby every time he eats his green food.


Furthermore, I have been decorating the house. The other day my son helped me to paint tomato sauce tins with chalkboard paint to organise his study room. We also painted a board to stick the tins onto. My husband drilled the nails through the tins onto the board to make it secure, and after he screwed in the wall.


My son organized his pencils, rulers, scissors, crayons, markers, colored pencils, pens and erasers into the tins. As my son is bilingual, Portuguese and English,  I labelled the tins in Portuguese.


 His desk is painted with chalkboard paint too. We hung the tin organizer above the desk. It looked super cute and it is a great way to recycle.


Lately, my son is very much interested in making scientific experiments. He has a few books from the "Times for Kids" which is completed with interesting facts and experiments for the kids to learn. This week he wanted to make a "blubler". Blubbler is a thick layer of fat that insulates animals in Winter. This experiment is very easy to make as well as easy to comprehend as a concept.
What you need:
vegetable shortening
2 ziplock bags
a bowl of ice water with ice cubes

Directions:
1 - Put vegetable shortening into one ziplock bag until its one third filled.


2 - Turn the other ziplock bag inside out. Place it inside the bag filled with shortening, and spread out the shortening evenly. The shortening  should be trapped between the two bags like a layer of blubber.

3 - Put your hand into the inside out bag.

4 - Put your bare hand into the ice water to feel how cold it is. Then put your blubber mitten into the ice water.


Questions to ask:
Does the water seem colder with the mitten hand or bare hand?
Will you explain the meaning of blubber?
Can you give me examples of animals that have a layer of fat to keep themselves warm?

Thanks for reading my blog, I really appreciate your support.

Love,
Fabiana

Friday, July 26, 2013

Chocolate Ganache Cupcake

Tomorrow my little baby is 1 month old :))!!! Awwww, isn't he adorable :))))!!!!!!


To celebrate my son's birthday, big brother and I made chocolate cupcakes today. This is my favorite desert from my wonderful friend Marc Sievers. He is an amazing cook and a fantastic person, always positive and smiley. His food is superb, which I highly recommend you to try. His book "Entertaining with Love" is available at Amazon. You may also check his website for daily updates.

The cupcake recipe that we made today is on his website and book, and its called Rich Chocolate Ganache Cupcakes. 
This recipe is super easy to make and it tastes delicious :). Thanks Marc for this recipe :)))!!!


INGREDIENTS
Batter
Butter – ¼ pound, unsalted, room temperature
Sugar – 1 cup
Salt – ¼ teaspoon
Flour – 1 cup all-purpose flour
Eggs – 4 extra-large, room temperature
Vanilla – 1 tablespoon, pure extract
Cocoa Powder – ¼ cup, unsweetened powder
Chocolate Syrup – 16 ounces

Ganache
Heavy Cream – ½ cup
Chocolate Chips – 8 ounces, semisweet

DIRECTIONS
Batter
Preheat the oven to 325 degrees F and line a muffin pan (large cups) with paper liners.

Next, cream the butter and sugar until light and fluffy using an electric mixer fitted with a paddle attachment.  Add the eggs carefully—1 at a time—and combine thoroughly.  Then, pour in the vanilla and the chocolate syrup and mix well.

For the best results sift together your flour and unsweetened cocoa powder.  Then, gently add the dry mixture to your mixing bowl and mix until just combined (do not over-mix or your cupcakes will be unpleasantly dense).

Next, scoop the batter equally into the muffin cups and bake for 30 minutes, or until just set in the middle.  Do not over-bake the cupcakes.  Let them cool thoroughly in the muffin tin.

Ganache & Assembly
Heat the heavy cream and chocolate chips in a double boiler over simmering water until smooth and warm.  Stir occasionally.  In this step you are melting and heating the mixture, not cooking it as it will burn.

Finally, once the cupcakes have cooled, dip the tops of the cupcakes into the ganache and enjoy!  The ganache will remain soft and creamy and will not set hard.
Do not refrigerate.


Let me know what you think of the recipe please :))). Enjoy!!!!

I also would like to remind you of our giveaway which ends on July 31st. To have a chance to win a wonderful prize enter the rafflecopter below please. One lucky winner will win a package with 126 pages about Insect and Spiders. Good luck!!!!!


a Rafflecopter giveaway

Have a wonderful weekend!! Thanks!!!

Fabiana

Thursday, July 25, 2013

Granola Bar

Hello :))),

Today I would like to share a delicious granola bar recipe that my son made. This recipe was very easy for him to make. He did it all by himself, I was around only to monitor him and dealing with the oven. I love this recipe because I can add any ingredient and it will always taste great.

Ingredients:
2 cups old fashioned oats
3/4 cup brown sugar
1/2 cup flaxseed
1 can sweetened condensed milk
3/4 tsp cinnamon
1 cup all-purpose flour
3/4 cup cranraisins
1/2 cup sliced almond
2/4 tsp salt
1 egg beaten
1/2 cup vegetable oil
2 tsp vanilla extract

Directions:
Preheat the oven to 350 degrees F (175 degrees C). Grease a 9x13 inch baking pan, then cover it with a parchment sheet and grease the paper.
 
In a large bowl, mix together the oats, brown sugar, flaxseed cinnamon, flour, cranraisins and salt. Make a hole in the center, and pour in the condensed milk, egg, oil and vanilla. Mix well using your hands. Pat the mixture evenly into the prepared pan.
 

Bake for 30 to 35 minutes in the preheated oven, until the bars begin to turn golden at the edges. Cool for 5 minutes, then cut into bars while still warm. Do not allow the bars to cool completely before cutting, or they will be too hard to cut.


Granola bars are a healthy snack that my son loves to make and eat :))). Let me know what you think about this recipe when you try with your kids please :)). Enjoy!!!!

Thanks!!
Fabiana

Wednesday, June 19, 2013

Sugar Cookies

Hello everyone :)))!!!! Hope you are all fine.

The last few weeks have been quite tiring and difficult for me as I approach the end of my pregnancy. If you were once pregnant you may understand my sentiments :))): sleepless nights, body aches, the baby is heavy, and so on. However, one knows all the sacrifices made will soon be rewarded with a precious little person I love more than I can think of now. My due date is on Sunday the 23rd, and I can't wait to hold my baby. I pray he comes on time :)))).  Please pray for me :)). Thank you!!!!!

Meanwhile, I am developing a new material and my son is doing the exercises to test it, as well as revising previously studied subjects. My new product will soon be available on TPT, I will keep you updated :). He is also spending a lot of time cooking with me in the kitchen :)))).

Yesterday we started making sugar cookies, which was finished today because we left it chilling overnight.

Ingredients:
1 1/2 cups of butter, softened
2 cups white sugar
4 eggs
1 teaspoon vanila extract
5 cups all-purpose flower
2 teaspoons baking powder
1 teaspoon salt

Directions:

In a large bowl, cream together butter and sugar until creamy and light. Beat in the eggs one at time, and add vanilla. Stir the flour, baking powder and salt, make sure to add it in parts. Cover and chill the dough for at least one hour or overnight. I prefer to chill it overnight as the consistency of the dough and the results are better. It makes the cookie softer.

As the chilling time is over, preheat the oven to 400 degrees F. Roll the dough on a floured surface 1/4 to 1/2  inch thick. Cut into shapes that you like using a cookie cutter. Place the cookies 1 inch apart on a baking tray covered with parchment sheet.

Our mixer broke last weekend, which was a pity :(, but I worked well for this recipe as my son got his hands really on the work.


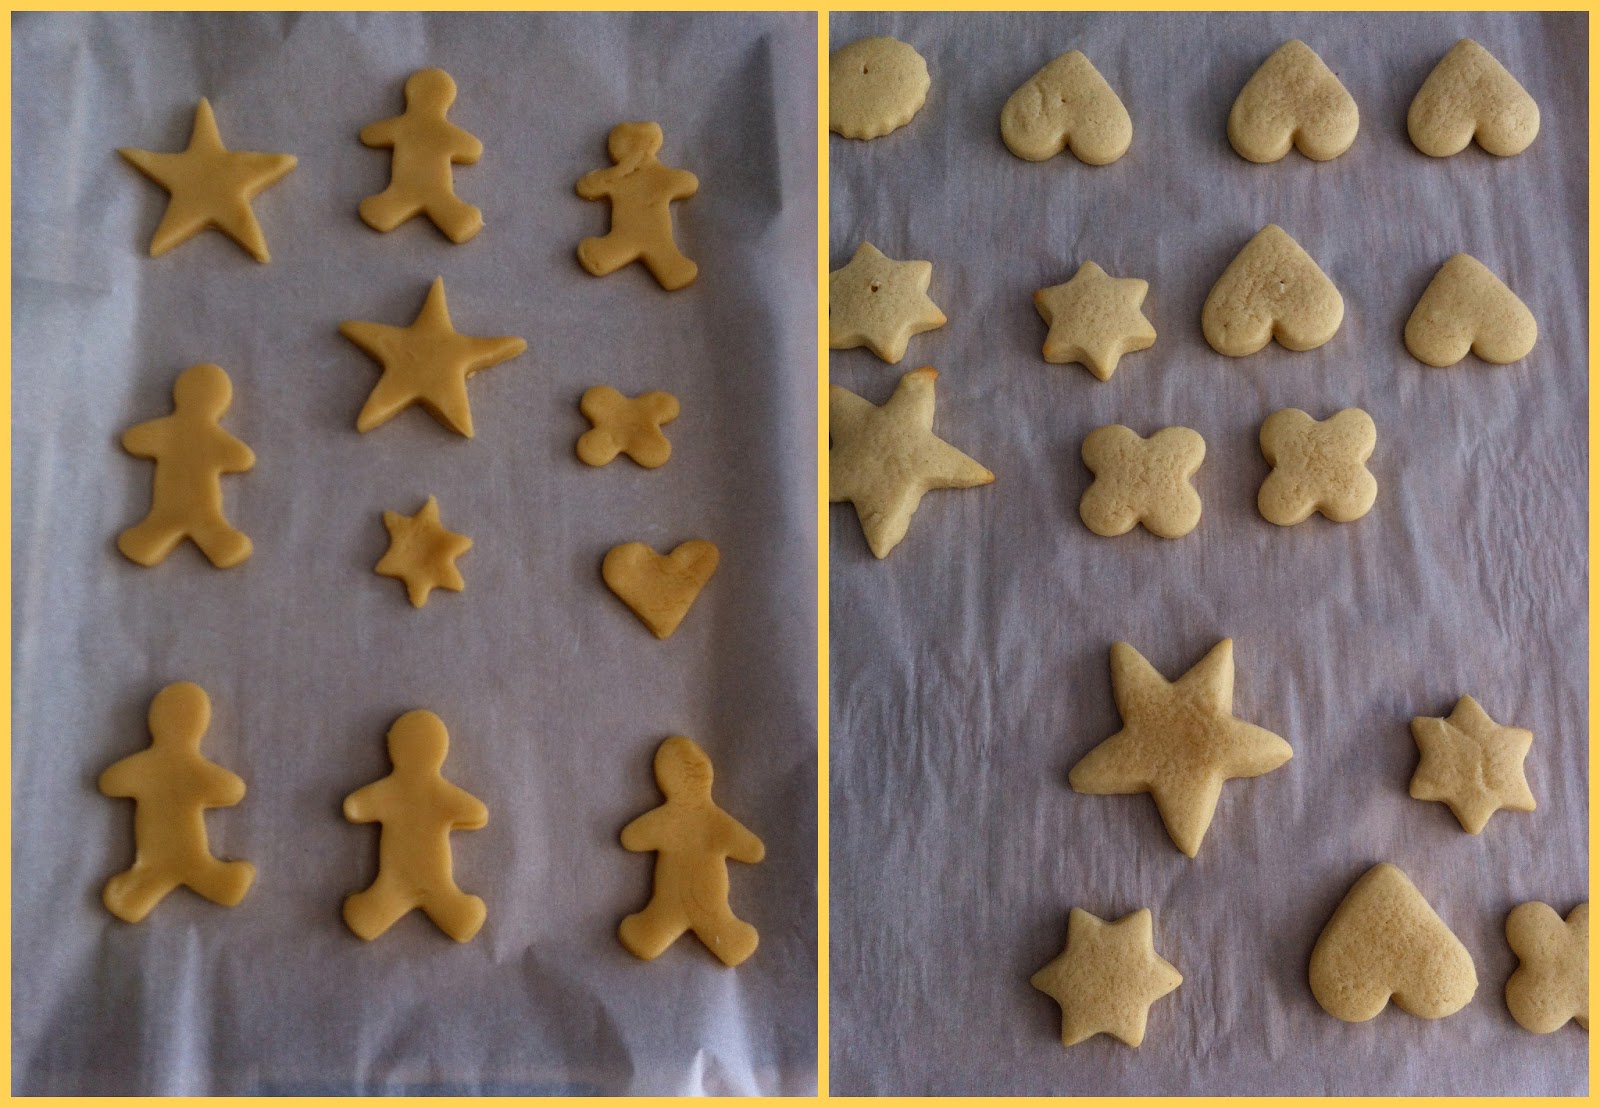
Bake the cookies for about 5 to 8 minutes, or until the bottom starts to brown. The image below shows the cookies uncooked on the left, and cooked on the right. The cookies are super delicious and soft, it is quite tasty to eat it without icing too :))).


To make the icing you will need:
1 cup confectioners' sugar
2 teaspoons milk
2 teaspoons light corn syrup
1/4 teaspoon almond extract
food coloring

Directions:
In a small bowl, stir together the confectioners' sugar and milk until smooth. Beat in corn syrup and almond extract until icing is smooth and glossy. If the icing is too thick, add more corn syrup. Divide it into separate bowls, and add food coloring to each desired intensity.

My son preferred to dip the cookies in the icing, and also adding sprinkles on top. The boy shape cookies he decorated using a squeeze bottle.


The following image demonstrates the result of my son's sugar cookie decoration. It looks great, and tastes amazing with the icing. Because we put almond extract in the icing, it has that cherry unique and delicious taste.


I highly recommend you make these cookies, it is easy to make and a perfect baking recipe to make with your kids. They will love it, and you two will have a lot of fun. I would be very glad to hear from you when you try this recipe :))).

Thanks for reading my blog :))). Take care!!!

Fabiana

Friday, April 12, 2013

Baking

This week is been quite busy for us as we are preparing to move into a new place next week. I am very excited but also tired with all the things that come along with moving.

As I am quite busy with our move, I am taking this opportunity to revise many of the subjects we have covered so far. I had many worksheets that I printed on TPT to help me with the assessments.

Today, my son revised mathematics, and he also helped me to make  homemade bread and cinnamon rolls. I know I said this many times and it might sound repetitive, but I believe its very important to emphasize the importance of teaching our kids to cook.  Since, he was a little boy I always tried to make him involved in the kitchen, which made him appreciate food, and most importantly learn to eat healthy food. He really enjoys measuring, stirring and assembling. He enjoys when I make homemade bread because he can punch the dough really hard to make it ready to be cooked.


Have a wonderful weekend. Thanks.

Fabiana

Saturday, March 16, 2013

St. Patrick's Day Cupcake

I was planning to go to the St. Patrick's parade today, but it was too cold and snowing a little bit here in Chicago. Hence, I decided not to go and instead spend my day baking with my son :)), which was the best decision ever. My son and I had a wonderful and messy time baking cupcakes. My son got  really hands-on today making cupcakes. He loves being part of the cooking: mixing the ingredients, licking the bowls, and making experiments with the dirty dishes afterwards. This is one of those types of activities that have a variety of advantages helping him to develop his creative skills, hand and eye coordination, listening skills, chemistry as well as maths skills.


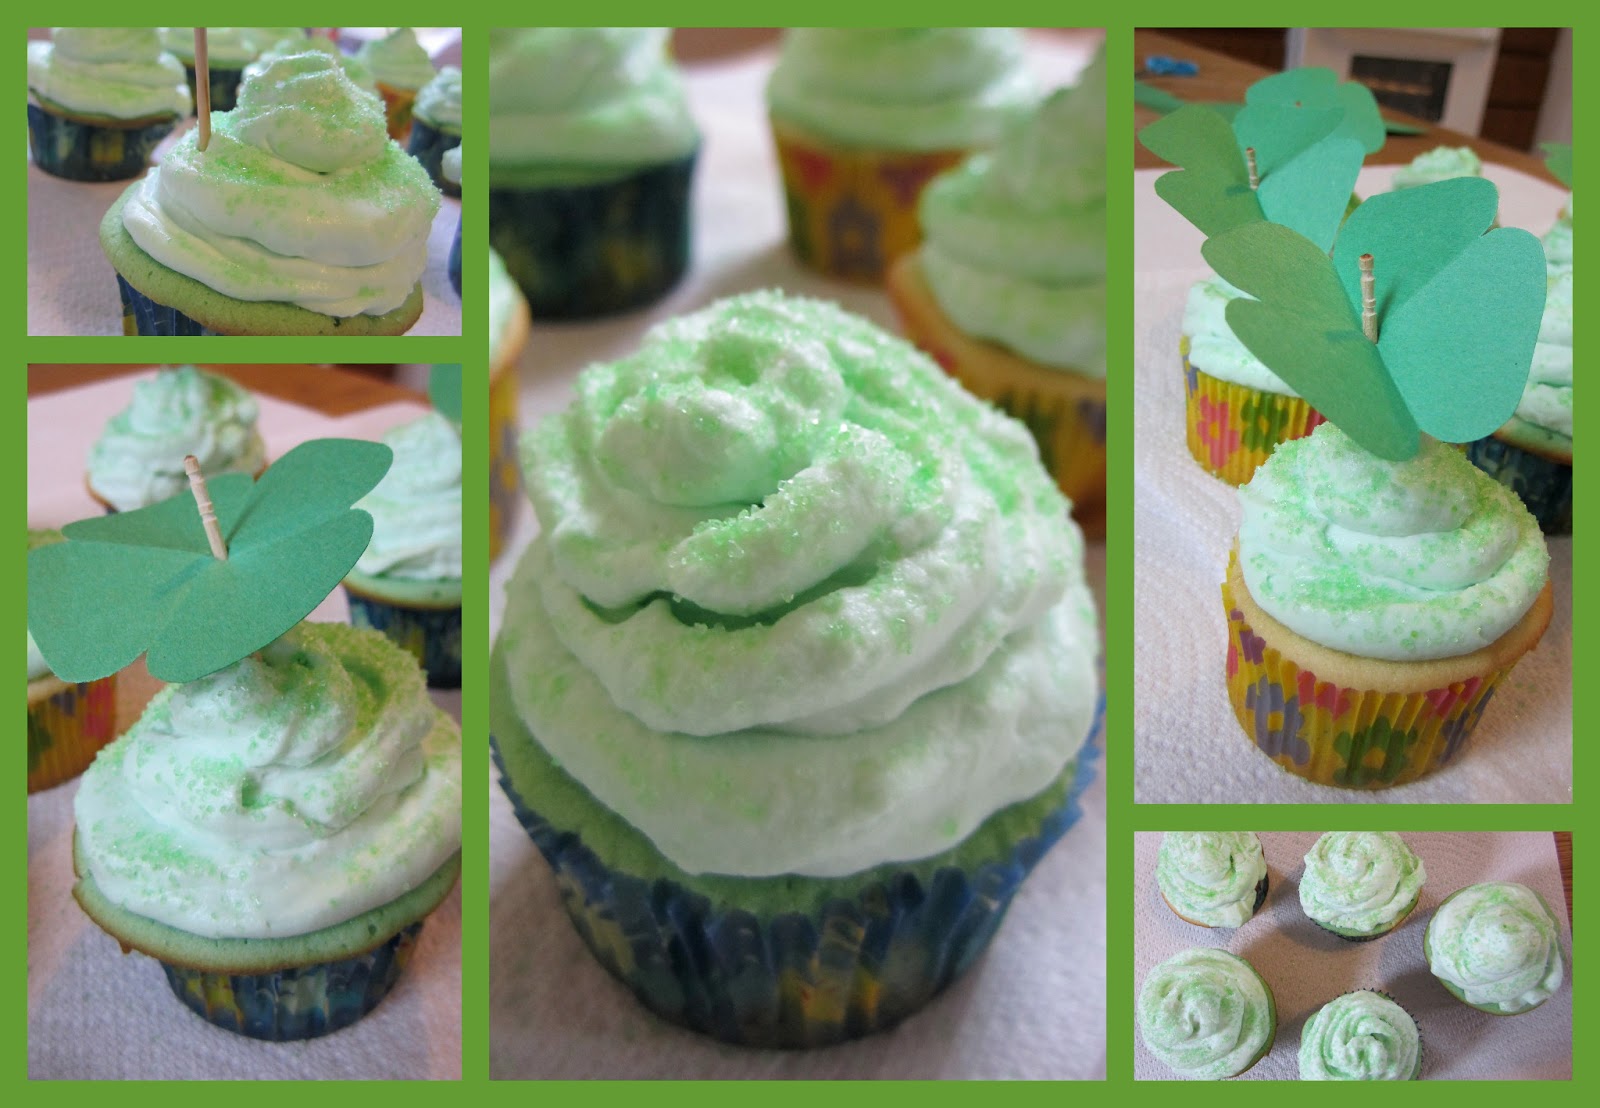
Whilst, we were waiting for the cupcakes to cook, we created our shamrocks leaf.


As soon as the cupcakes were cooked and cooled, we decorated them with the frosting. I loved watching my son taking charge, and decorate his cupcakes in the way that he desired. He was very proud of himself :)))!!!


After frosting and putting sprinkles on the cupcake, my son decorate it with the shamrocks. He used a toothpick to hold the shamrock.


He did an awesome job :))!!!


The following are images of the ones I decorated.


Moreover, my son did a few exercises on worksheets focusing on patterns, problem solving, CVC word and word search. All these materials were downloaded on TPT.


 We have a beautiful and very gentle dog, her name is Jessie. She was spaded and the last two weeks she has been on antibiotics because of complications with the operation. As a result, she is feeling quite miserable lately.


To cheer her up and inexhaustible good cheer and energy we made her dog biscuits. The recipe is very easy to make, which I took from King Arthur Flour, and the name of the recipe is best of breed dog biscuit - http://www.kingarthurflour.com/blog/2010/12/13/puppy-love-our-biscuit-taste-test/
I did not have a bone shape biscuit cutter, thus I sketched it on a piece of parchment sheet, and shaped it using a toothpick. It took me approximately 30 minutes to make 12 biscuits, but it was worth. It looked quite nice :).
 

The image below is a picture of the biscuit before and after baking. It needs to look dark brown and crispy. 


I also shaped the biscuits with other cutters I have available at home. The biscuits looked nice, and tasted  very delicious. My dog (Jessie) and my husband approved, they both enjoyed eating :))).


 Have a terrific Sunday. Thanks :).

Fabiana