
Materials: white construction paper, cooking oil, the website suggested food coloring, but I used painting because I didn't have it at home. It also suggested aluminium roasting pan, but I used a baking pan and covered it with aluminium foil. As well as measuring spoons, 3 plastic cups, fork, and newspaper to cover the table.

Procedure:
1 - I read the instructions to my son and he followed. The first step was to measure one tablespoon of oil and place it into each plastic cup.

2 - Measure 1 teaspoon of the 3 different painting colours or food colouring, and put each one into its cup with oil.

3 - Stir the mixture in each cup with the fork (wipe it off between colors) until the food coloring is well mixed.

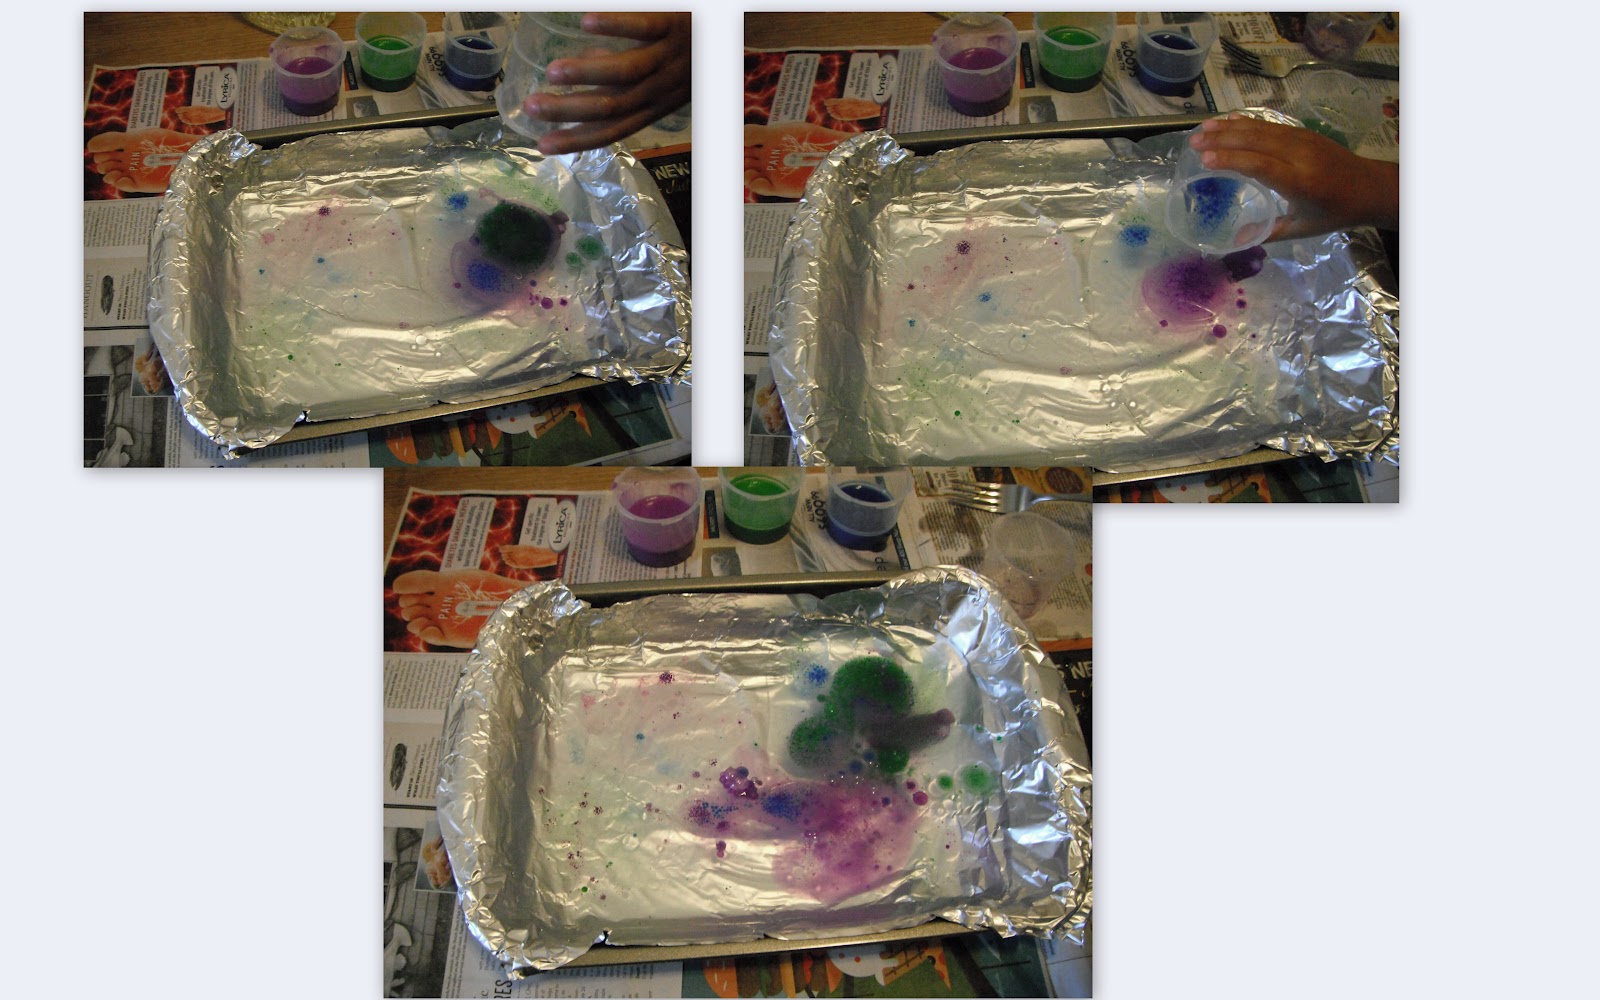
4 - Fill the pan with water, but not all the way to the top.

5. Pour a little bit of one colored oil mixture onto one area of the pan. Then repeat this with the other two colors, on different areas of the pan.

6 - My son got impressed with the bubbling oily colours, and he wanted to pour a bigger quantity to see the result, thus he poured all the mixture into the water.
7 - The website suggested to make an artwork laying a piece of construction paper on top of the water. After 30 seconds, carefully lift it off and see the effect of the colors on the paper.

8 - My son and I weren't so impressed with the artwork, it definitely didn't turn up in the same way they showed on their website. Maybe it was the colours and painting that we used, I don't know, but we decided to try again by using more oil and painting. We basically doubled the recipe.

The second artwork looked better, but I am still not convinced. Nevertheless, we definitely enjoyed the experiment, specially my son. He liked it so much that he kept playing with it for extra 1 hour. He stirred the mixture with the fork and the measuring spoon, and then drew an Indian house and laid the construction paper onto the mixture. As the paper was blue, it didn't show the colourful oily bubbles, it was just an oily blue paper :(((((. But he wanted to analyse it and I didn't want to stop him!!!!! I was quite pleased that he wanted to carry on playing and investigate what else he could get from this experiment. Afterwards, he put his hand in the oily water to fell it and he said to me: "Wow, look at my hands, it feels soft and oily"!!!! He kept playing with the plastic cups, the measure spoon and a bottle of water pouring the mixture in and out.

Even though the artwork didn't turn up the way I expected, I will definitely do this activity again, but this time I will use food colouring, instead of painting, and also the same colours as they used.
I try always in the end of the activities I do with my son to know his thoughts. He told me that he liked this activity very much because there was explosions of oily colourful bubbles, and it was cool!!!! He also liked that the oil didn't mix with the water. I highly recommend this activity as it promotes curiosity to experiment different things, learn about measurements and science.
No comments:
Post a Comment
.